How to Design a Dedicated Home Maintenance Access Plan for Concealed Plumbing and Electrical Infrastructure
The Hidden Cost of Sealing Services Behind Finished Walls
Every finished wall in a modern home hides something that will one day need attention: a shut-off valve, a junction box, a shower mixer, a drain cleanout or a damper control. The day that component fails, the quality of the access provided for it decides whether the repair is a thirty-minute job or a two-day demolition. A home without an access plan pays for its tidy walls many times over, in cut plasterboard, re-tiling and redecoration that costs far more than the valve or the wire ever did.
The problem is not that builders hide services; hiding them is correct, and exposed pipes belong in a plant room, not a bathroom. The problem is that the hiding is done without a record of where things are or how to reach them. A maintenance access plan is simply that record, made before the walls are closed: a map of every concealed service, the access point provided for it, and the tool or method needed to open it. It turns a mystery hunt behind the plaster into a scheduled task.
What a Maintenance Access Plan Actually Maps
A maintenance access plan maps four things for every concealed service in the home: what it is, where it is, how to reach it, and how often it needs attention. The 'what' is the component itself, such as the main water shut-off, a shower mixing valve, an electrical junction box or an underfloor heating manifold. The 'where' is its position measured from fixed reference points like a corner or a floor level, not from a memory that will fade within a year.
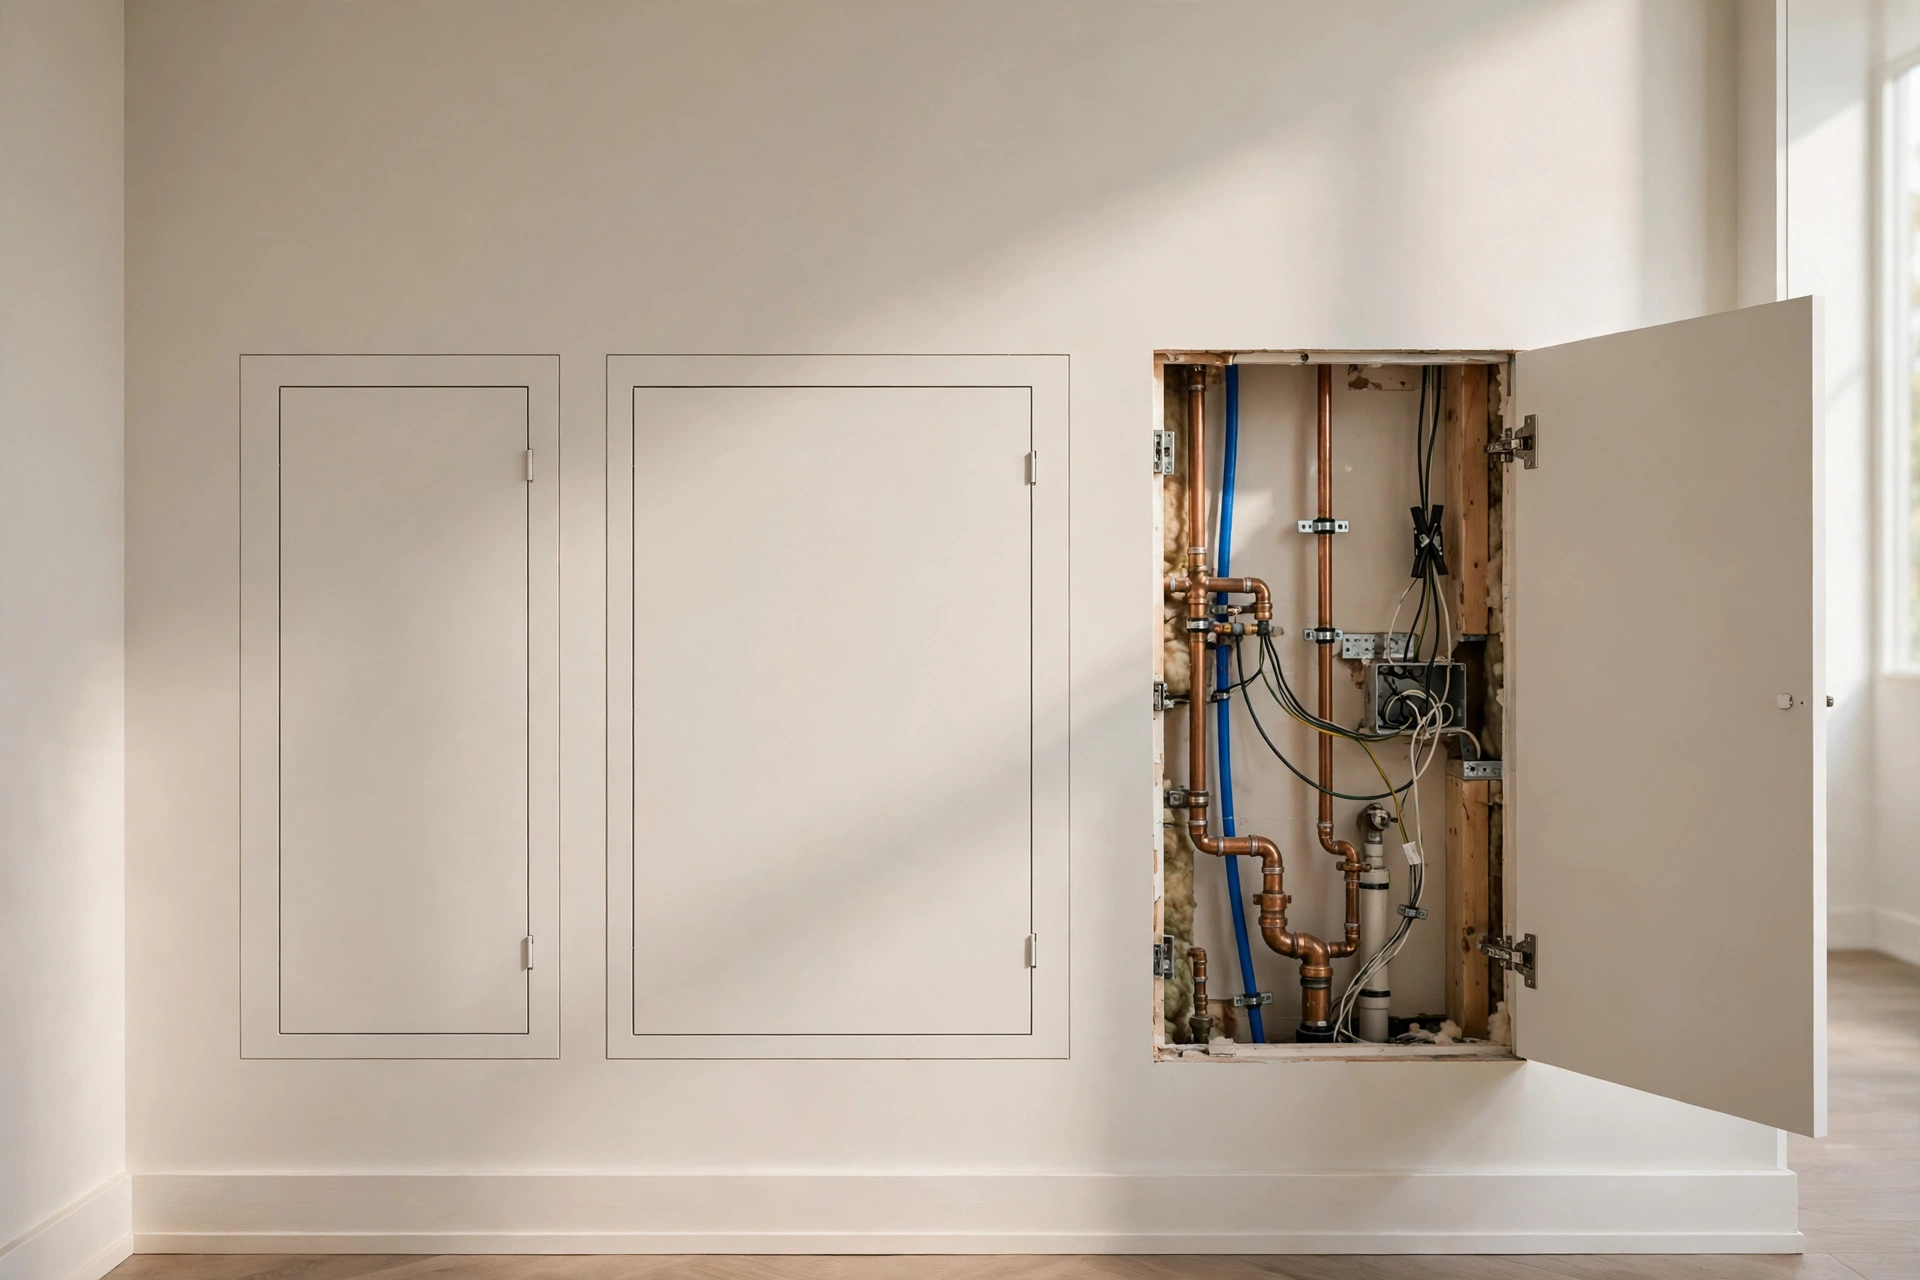
The 'how' is the access method: a flush panel, a magnetic cover, a removable tile, a loft hatch or a service cupboard. Each method suits a different situation, and the plan records which one serves each component. The 'how often' turns the map into a schedule, because a valve that is exercised twice a year will still turn when it is needed, while one left untouched for a decade may seize. A plan that covers all four questions for every service is complete; one that only lists locations is a treasure map with half the clues missing.
Mapping Every Concealed Valve, Junction and Cleanout
Mapping starts during construction or renovation, when the services are still visible, because that is the only moment when positions can be recorded exactly. Photograph every wall before it is boarded, with a tape measure in the frame for scale, and note the height of each valve, junction and cleanout from the finished floor level. These photographs are the most valuable part of the plan, and they cost nothing but the discipline to take them.
The map itself can be a simple set of marked-up floor plans, one per floor, with each service given a code and a short entry in a register. The register records the service, its location, the access panel that serves it, and its service interval. The table below shows the entries a typical family home needs, and it is a useful checklist when walking the house before the walls are closed.
| Concealed service | Typical location | Access method | Check interval |
|---|---|---|---|
| Main water shut-off | Under stairs or utility wall | Flush panel, 400 mm | Twice a year |
| Shower mixing valve | Behind shower wall | Tile-integrated panel | Annually |
| Electrical junction boxes | Ceilings and stud walls | Magnetic or screw-fixed panel | Every 3 to 5 years |
| Drain cleanouts | Bathroom and kitchen walls | Removable tile or panel | Annually |
| Underfloor heating manifold | Utility cupboard or hallway | Cupboard door or large panel | Before heating season |
| HVAC damper controls | Ceiling voids | Ceiling access hatch | Annually |
Choosing Panel Types Room by Room
Access panels are not one product but a family, and the right choice depends on the room, the finish and how often the service needs attention. In a tiled bathroom, a tile-integrated panel disappears into the wall because it carries the same tile as its surroundings, which suits a shower valve that may not be touched for years. In a painted hallway, a flush steel panel that can be painted over is nearly invisible and opens with a simple press catch.
- Use tile-integrated panels in bathrooms and kitchens so the access point disappears into the finished surface.
- Use magnetic panels where a tradesperson needs tool-free access, such as ceiling voids with dampers or junction boxes.
- Use screw-fixed panels where children can reach them, since the tool requirement is itself a safety feature.
- Use fire-rated panels in any fire-rated wall or ceiling, matched to the same rating as the surrounding construction.
- Size the panel for the work, not the component: a valve needs a hand, but a manifold replacement needs forearms and a wrench.
The most common sizing mistake is choosing a panel that fits the valve but not the hands and tools needed to work on it. A 200 mm panel reaches a stopcock; a 400 or 600 mm panel lets a plumber actually replace one. When in doubt, go one size larger, because a slightly visible panel is a small price for a repair that does not require demolition.
Sizing and Placing Panels So Trades Can Work Through Them
A panel's position matters as much as its size. The natural place for a panel is centred on the component it serves, but that is not always possible, especially when a stud falls in the middle of the ideal spot. In that case the panel should move to the nearest stud bay, which is typically about 370 mm wide between studs, and the plan should record the offset so nobody cuts into a stud looking for a valve that sits 100 mm to the side.
Height matters too. Panels serving valves and cleanouts belong at a comfortable working height, roughly waist to chest level, while panels serving ceiling services need a hatch large enough for head and shoulders, typically 600 mm square. A panel placed too high, too low or behind a fixed cupboard is almost as bad as no panel at all, and it is worth walking the plan with the plumber and electrician before the boards go up, because they know what their hands and tools will need.
How to Build the Plan Into a Renovation Schedule
An access plan fails if it is treated as paperwork after the renovation, because by then the walls are closed and the positions are guesswork. It has to be built into the schedule as a sequence of small tasks at the right moments: mapping during first fix, panel installation during second fix, and recording and labelling before handover. Each stage takes minutes when done at the right time and hours when done late.
During first fix, photograph every wall with services visible and measure each component from a fixed corner and the floor.
Mark panel positions on the floor plans and agree them with the plumber and electrician before any boarding starts.
Fit panel frames during second fix, checking that each frame is square, flush and centred on the service it covers.
Confirm every panel opens onto its component by hand before the room is finished, and adjust any that are offset.
Label each panel inside with its code, the service behind it and the date, then file the register and photographs together.
Walk the homeowner through the register at handover and store a digital copy where it cannot be lost in a move.
The handover walk is the moment the plan changes from the builder's paperwork into the homeowner's tool. Ten minutes spent opening each panel and pointing at the valve behind it saves hours of searching years later, and it gives the homeowner the confidence to isolate a leak at midnight instead of waiting for morning.
Labelling, Photos and a Digital Record That Outlives the Builder
Labelling closes the loop inside the house. A small label on the inside face of each panel, giving its code and the service behind it, means anyone opening it knows what they are looking at without consulting the register. For the main shut-offs, a label on the outside face is worth having too, because in an emergency nobody should have to guess which panel hides the water main. Keep the labels short, factual and free of jargon, since the person reading them in a crisis may not be the person who installed them.
Fire-Rated Walls, Wet Rooms and Other Places Panels Need Special Care
Not every wall can take an ordinary panel. A fire-rated wall or ceiling is part of the home's fire protection, and cutting an unrated hole in it defeats the rating. Any panel in such a wall must be fire-rated to match, with the correct intumescent seals and fixings, and it must be installed exactly as the manufacturer specifies. This is not a place for improvisation, and a building inspector will rightly ask for the panel's certification.
Wet rooms bring a different risk. A panel in a shower wall sits in the wettest part of the house, so it needs a tile-integrated or fully sealed design that keeps water out of the void behind it. A standard steel panel with a press catch will let water past its edges over time, and the result is damp in the wall that nobody sees until the tiles start to move. In wet areas, the panel is part of the waterproofing system, not just a cover, and it should be detailed and tested like one.
Keeping the Plan Current After Every Repair
An access plan is a living document, and it decays every time a repair changes something without updating the record. A valve that is replaced with a different type, a junction box that is moved during a bathroom refit, or a new manifold added for an extension all make the old map wrong, and a wrong map is worse than no map because it sends people to cut in the wrong place.
- Photograph every change before the wall is closed again, with the same reference points as the original record.
- Update the register entry with the new component, position and date, and retire the old photograph rather than deleting it.
- Re-label the panel if the service behind it has changed, so the label and the register always agree.
- Review the whole plan once a year, ideally before the heating season, and confirm the main shut-offs still turn freely.
- Keep a printed copy of the register in the utility cupboard as a backup for the day the phone is flat or lost.
A plan that is maintained becomes part of how the house is run, like servicing the boiler or clearing the gutters. The households that benefit most are the ones that treat the five-minute update as non-negotiable, because the cost of a stale plan only becomes visible at the worst possible moment, usually at midnight with water on the floor.
When to Let a Licensed Plumber or Electrician Open the Wall
An access plan empowers a homeowner, but it does not turn one into a plumber or an electrician. There are clear lines. A homeowner can open a panel, close a valve, reset a breaker and photograph a leak. Cutting into a pipe, moving a junction box or altering a circuit belongs to a licensed professional, and in many jurisdictions electrical work in bathrooms and kitchens is legally restricted to qualified installers.
The plan actually makes professional help cheaper and faster, because the tradesperson arrives to a labelled panel and a photograph instead of a mystery wall. Call a plumber for anything involving a pressurised pipe, a gas connection or a drain below ground level, and call an electrician for anything inside a junction box, a consumer unit or a circuit that serves a wet room. If water is coming through a ceiling or there is any smell of burning from an electrical fitting, isolate the supply and call the same day rather than waiting to see if it stops.
Home Maintenance Access Plan FAQs for Concealed Services
How do I find a shut-off valve that is already hidden behind a wall?
Start with the most likely places: under the bath, behind the kitchen sink unit, in the airing cupboard and near the water meter. A stud finder and a thermal camera can hint at pipe runs, and a plumber can use a small inspection camera through a discreet hole. Once found, fit a panel and record it.
What size access panel should I fit for a shower valve?
A 400 mm square panel is a good minimum for a shower mixing valve, because it admits a hand and a wrench. Smaller 200 mm panels suit simple stopcocks, while a 600 mm panel is better where a manifold or several connections sit together behind one opening.
Do access panels have to be fire-rated?
Only where they sit in a fire-rated wall or ceiling, such as a garage-to-house wall or a protected stair enclosure. Elsewhere a standard panel is fine. A fire-rated panel must match the rating of the surrounding construction and be installed exactly as the manufacturer specifies.
Can I put an access panel in a tiled shower wall?
Yes, using a tile-integrated panel that carries the same tile as the surrounding wall. It stays watertight when detailed as part of the waterproofing system, and it is the standard solution for reaching a shower mixer without breaking tiles.
How often should I exercise the shut-off valves in my access plan?
Twice a year is enough for most valves: turn each one fully off and back on again, and check that it moves freely and does not drip. Valves that sit untouched for years are the ones that seize when you need them most, so put the check on a calendar.
Final Thoughts: An Access Plan Turns a Crisis Into a Five-Minute Job
A maintenance access plan is not glamorous, and no guest will ever admire it. Its value appears exactly once, on the day something fails behind a finished wall, and on that day it is worth more than any visible upgrade in the house. A labelled panel, a photograph and a register entry are the difference between turning a valve and cutting a hole, between a plumber's half-hour visit and a builder's two-day repair.
If your home has concealed services and no plan, start this weekend. Photograph the panels you already have, find the main shut-off, and write down where everything is. If you are renovating, insist the plan is built into the schedule before the walls close. The walls will look exactly the same either way, but the next repair will not.