How to Prevent Ice Dams and Winter Moisture Damage Along Residential Rooflines
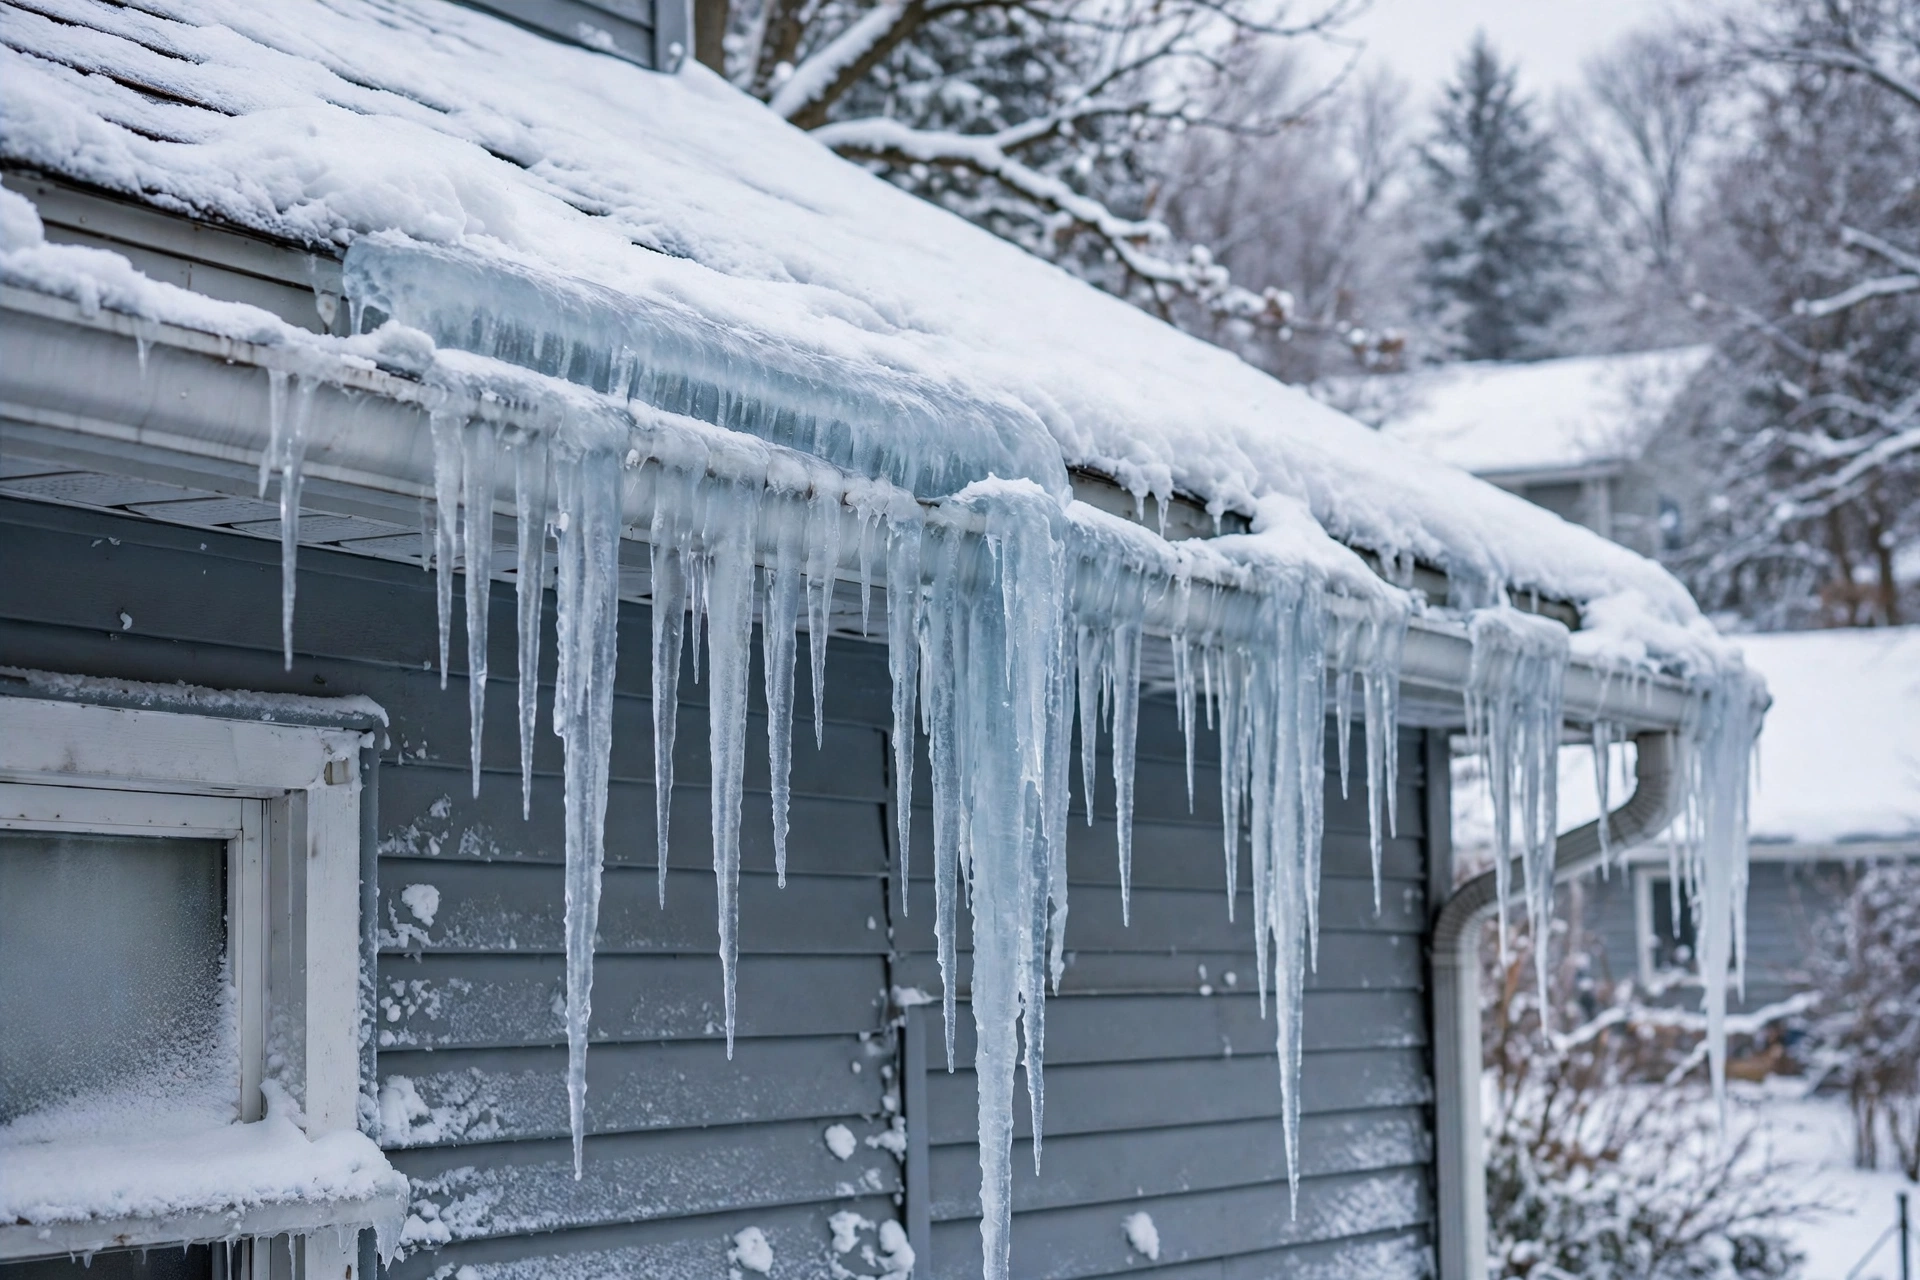
An ice dam looks harmless at first: a thick ridge of ice along the edge of the roof, often with pretty icicles hanging from the gutters. Behind that ridge, though, trapped meltwater can back up under the shingles, soak the roof deck, stain ceilings, and damage insulation. Ice dams cause expensive water damage every winter, and they return year after year unless the cause is fixed, not just the ice.
The direct answer is that ice dams are prevented by keeping the roof surface at a more even temperature and keeping water moving off the roof. That means sealing air leaks from the living space into the attic, insulating the attic floor evenly, balancing soffit-to-ridge ventilation, and keeping gutters and valleys clear. Removing the ice treats the symptom; fixing heat loss treats the disease.
How Ice Dams Form on a Residential Roofline
An ice dam starts with uneven roof temperatures. Warm air escapes from heated rooms into the attic and warms the upper part of the roof deck. Snow on that warm section melts, runs down toward the eaves, and then reaches the overhang, which extends beyond the heated house and stays cold. The meltwater refreezes there and forms a ridge of ice.
What Ice Dam Warning Signs Should You Check After Every Snowfall?
- Thick icicles hanging from the gutters or eaves, especially on only one side of the house.
- A visible ridge of ice along the roof edge, with snow melted above it and frozen below.
- Water stains, damp spots, or peeling paint on ceilings and walls near exterior walls.
- Damp or compressed insulation, frost, or mold in the attic after a thaw.
- Gutters pulling away from the fascia or sagging under the weight of ice.
Check the roof from the ground after each significant snowfall and again during a thaw. Binoculars help you inspect the eaves safely without climbing a ladder in icy conditions. If you see water stains inside the house, act quickly; the leak is already happening, and the next freeze-thaw cycle will make it worse.
Starting in the Attic: Finding the Heat Leaks That Feed Ice Dams
The attic is where most ice dam problems begin, so it is the best place to start an inspection. Look for insulation that is thin, compressed, missing, or uneven, and for dark, dusty patches that show where warm air has been leaking through. Common leak points include recessed lights, plumbing stacks, attic hatches, bathroom exhaust fans, wiring openings, and gaps around chimneys.
On a cold day, you can sometimes see the problem directly: frost on the underside of the roof deck, or bare patches of roof where snow has melted while neighboring roofs are still covered. A professional energy audit with a blower door test and infrared camera will pinpoint leaks precisely, and it is money well spent if ice dams return every winter despite your efforts.
Sealing Attic Air Leaks Before Adding More Insulation
Air sealing comes before insulation, because insulation slows heat transfer but does not stop air movement, and warm, moist air carries both heat and humidity into the attic. Seal gaps around light fixtures, pipes, wires, and the attic hatch with caulk, foam, or weatherstripping, and box in recessed lights with rated covers where required. Pay special attention to the top plates of interior walls, where framing gaps let warm air rise straight into the attic.
Do not seal the attic completely airtight without considering ventilation; the goal is to stop uncontrolled leaks from the living space, not to eliminate airflow through the roof vents. After air sealing, check that bathroom and kitchen exhaust fans vent outside through the roof or wall, not into the attic, where their warm, moist air feeds ice dams and mold.
Attic Insulation Levels That Keep Rooflines Cold and Even
Even insulation across the attic floor is what keeps the roof deck cold and the snow melting evenly. In many regions, attics need insulation in the range of R-38 to R-49, which typically means 12 to 16 inches of fiberglass or cellulose, but the right level depends on your climate zone, so check local energy code recommendations. The key is even coverage: a thin spot over a bedroom or a compressed batt near the eaves creates a warm patch that starts the melt-freeze cycle.
When adding insulation, keep it away from soffit vents using baffles or ventilation chutes, which maintain an open air channel above the insulation. Never block soffit intake vents with insulation, and never install a vapor barrier on the wrong side of the assembly for your climate. If the attic has knob-and-tube wiring or vermiculite insulation, get a professional assessment before adding anything, since both can pose safety hazards.
Balancing Soffit and Ridge Ventilation Along the Roofline
Ventilation carries away the heat and moisture that still reach the attic, and it works only when intake and exhaust are balanced. Cool air should enter through soffit vents at the eaves, travel along the underside of the roof deck, and exit through ridge vents or high roof vents. When intake is blocked or exhaust is missing, warm air stalls in the attic and warms the roof from below.
Gutters, Valleys, and Drainage That Keep Meltwater Moving
Clean gutters are a simple but powerful ice dam defense. Leaves, twigs, and shingle grit trap water in the gutter, where it freezes into a solid block that backs meltwater onto the roof. Clean gutters and downspouts in late fall, confirm that water flows freely, and extend downspouts so meltwater drains several feet away from the foundation.
Valleys deserve the same attention. Debris that collects in a valley freezes and creates a dam that forces water sideways under the shingles. Trim overhanging branches so leaves and twigs do not accumulate, and check that drip edge flashing directs runoff into the gutters rather than behind them. Gutter guards help in leafy areas, but they are not a substitute for an annual cleaning and inspection.
Roof Heat Cables and De-Icing Options for Stubborn Rooflines
Heat cables, also called roof de-icing cables, create a meltwater path through ice in problem areas such as north-facing eaves, valleys, and around skylights. Installed in a zigzag pattern along the roof edge and through the gutters and downspouts, they keep a narrow channel open so water can drain instead of pooling. They use electricity, so they add to winter energy bills and work best as a targeted fix for a specific trouble spot, not as a whole-roof solution.
Safely Removing an Ice Dam Without Damaging the Roof
If an ice dam is already leaking, the priority is to create a drainage channel through the ice so trapped water can escape. The safest method is low-pressure steam, applied by a professional with specialized equipment that melts a path through the ice without damaging shingles. Calcium chloride ice melt, placed in a nylon stocking laid across the dam, can also open a channel, but it works slowly and must be kept off plants and concrete.
Ice Dam Repair Costs and When Insurance Gets Involved
Prevention costs vary from a few hundred dollars for air sealing and gutter cleaning to several thousand for insulation and ventilation upgrades, depending on attic size and access. Professional steam removal of an existing dam typically costs several hundred dollars per visit, and repeated visits add up fast, which is why prevention is almost always cheaper than removal.
Homeowners insurance often covers sudden water damage from an ice dam, but it may not cover the roof repair itself or damage caused by neglected maintenance, so read your policy and document the damage with photos. Keep receipts for prevention work as well; insurers look more favorably on claims when the homeowner can show the roof and attic were maintained.
Ice Dam Mistakes That Make Winter Moisture Damage Worse
The most common mistake is treating the ice instead of the heat. Chipping ice, installing heat cables across the whole roof, or adding more vents without air sealing all leave the real problem in place, so the dam returns with the next snowfall. Another mistake is adding insulation over air leaks; the insulation hides the leak, traps moisture, and can make mold and rot worse.
A second group of mistakes happens during removal. Using rock salt or sodium chloride damages shingles, gutters, and plants, and it corrodes metal flashing. Pouring hot water on the dam creates a brief melt followed by a thicker refreeze. And ignoring the attic after the dam is gone means the wet insulation and stained decking stay damp all winter, inviting mold and wood decay.
When Ice Dam Trouble Calls for a Roofer or Insulation Pro
Call a professional when water is leaking inside, when the dam is too large or too high to reach safely, or when the same roofline dams up every winter despite basic prevention. A roofer can assess the shingles, flashing, and deck for hidden damage, while an insulation contractor can test the attic for air leaks and ventilation balance. Both should be licensed and insured, and both should explain the cause, not just quote a fix.
If the roof is old or the decking is already damaged, a roofer may recommend replacing the affected section with proper ice-and-water shield underlayment, which protects the deck even when a dam forms. That upgrade is most cost-effective when done as part of a planned roof replacement rather than as an emergency repair.
Final Thoughts: Stop Ice Dams at the Attic, Not at the Eaves
Ice dams are a symptom of heat escaping where it should not, and the lasting fix happens in the attic, not on the roof edge. Seal the air leaks, insulate evenly, balance the ventilation, and keep gutters clear, and the roof will stay cold enough that snow melts evenly instead of refreezing at the eaves. Do that work once, and the ridge of ice that used to return every winter simply stops forming.
Ice Dam Prevention FAQs
What causes ice dams on a roof?
Ice dams form when warm air from the living space heats the upper roof, melting snow that then refreezes at the colder eaves. The ridge of ice traps more meltwater behind it, which can back up under shingles and leak into the home.
How can I tell if I have an ice dam?
Look for a thick ridge of ice along the roof edge, heavy icicles, and snow that has melted above the eaves while remaining frozen below. Inside, water stains on ceilings or walls near exterior walls and damp attic insulation are warning signs.
Do gutter guards prevent ice dams?
Gutter guards help keep debris out of gutters, which supports drainage, but they do not prevent ice dams on their own. Ice dams are caused by heat loss from the attic, so air sealing, insulation, and ventilation are the real prevention measures.
Are roof heat cables worth it?
Heat cables are useful for a specific trouble spot, such as a north-facing valley or a section that dams every year, but they treat the symptom rather than the cause. They also use electricity all winter. Fix attic heat loss first and use cables only where the problem persists.
Can I remove an ice dam myself?
You can safely melt a drainage channel with calcium chloride in a nylon stocking laid across the dam, but never chip at ice with tools or climb onto an icy roof. For large dams or active leaks, hire a professional with steam removal equipment.
Will homeowners insurance cover ice dam damage?
Many policies cover sudden water damage caused by an ice dam, but coverage varies and maintenance-related damage may be excluded. Document the damage with photos, keep receipts for repairs and prevention work, and check your policy details before filing a claim.